Monday 15 August 2016

Perfect basmati rice


For 4 people (moderately hungry; if very hungry use 75g rice per person and increase amount of water proportionally)

200g basmati rice 
1 1/4 cup water
1/2 tsp Salt

Rinse the rice in cold water and drain.
Place in a heavy pan with the water and salt, stir and bring to the boil. 
Reduce the heat and simmer for 12 to 14 minutes, until the water has been absorbed and the rice is cooked.

Aubergine and courgette curry


This is a deliciously rich vegan curry perfect with fluffy basmati rice.


3 aubergines (about 600g)
2 courgettes
1 large onion
4 cloves garlic 
2 tbsp grated fresh ginger 
1 tbsp mustard seeds
2 tsp cumin seeds
1 tsp Garam masala 
2 tbsp Pataks madras spice paste
1 tsp ground coriander 
1 tin chopped tomatoes 
2 tbsp tomato puree 
1 chopped fresh Chili or to taste
1 tsp sugar
Sunflower oil 
Olive oil
Salt 
1 bay leaf 

Slice the aubergine and courgette  quite thinly, place in layers in a colander, salting each layer well. The salt will bring out th moisture from the vegetables. Set aside for at least half an hour.

Meanwhile make the curry sauce:
Chop the onion. Heat some sunflower oil I a large casserole, the n add the seeds and let them heat for a minute or two. Add the onion and sugar and let the onion soften and brown slightly. Next add the crushed garlic and ginger and the Pataks paste and heat gently, making sure the garlic doesn't burn. Add the rest of the spices and Chili, then about 100ml water and stir well, bringing to the boil. Add the tomatoes, tomato puree and bay leaf, along with more water if it looks a bit dry. Simmer gently whilst you fry the aubergine and courgette.

Rinse the aubergine and courgette  and pat dry with kitchen roll.
Heat some Olive oil and fry the vegetables in batches until they are tinged with brown and slightly softened. Add each batch to the curry sauce as you go. When all the aubergine and courgette is in the sauce, give it a good stir, then cover and cook in a preheated oven at 180c for about an hour. Check and stir after about 30 minutes, reducing the oven temperature to 150c.

Serve with basmati rice 


Wednesday 6 July 2016

Bibimbap (Korean Rice and Veggies)

This is a Korean classic and one that we consumed in great quantities when we were posted to Seoul eighteen years ago when veggie daughter was but 4 months old. (Eighteen years ago? how can it have been so long?) It's a cheap, healthy and delicious meal. You could phone the restaurant and get them to deliver it to your door; not a difficult task if you had a Korean speaker among you. We could just about make ourselves understood with our few words of broken Korean, even to the extent of ordering it meat-free. A few minutes later a man on a moped would appear, steering one handed with the other hand gripping a massive metal box full of our dishes of bibimbap and various side dishes too. I wish I'd thought to take a photo. My friend didn't realise you were meant to just leave the empty dishes on your front step for them to pick up later - she put them in the dishwasher and a very funny sign language conversation ensued when the delivery driver returned for the dishes and thought she'd pinched them. Fortunately he saw the funny side and came back when the dishwasher had finished.

Anyway, bibimbap translates as mixed rice. It consists of steamed rice and a selection of vegetables, normally topped with a fried egg. The mix of veggies varies according to season, and there are some very unusual roots and stems  in many versions that would be difficult to get hold of outside Korea. I checked out a few recipes online. I ended up combining bits from the Our Korean Kitchen cookbook printed here in the Guardian and another on this great website Korean Bapsang that I shall definitely be exploring again. We used a mixture of courgette, carrot, mushroom, spinach and beansprouts, which was great. You could use other veggies according to the season and your own tastes. Although it was a bit of a faff, the method for cooking the rice detailed in Our Korean Kitchen yielded a perfectly cooked result; I used Morrisons short grain pudding rice, topped up with a few grams of arborio because I didn't have quite enough. It was excellent with a very authentic texture.

You do need to get hold of Korean hot chili paste, or kochujang. This was unknown in the UK when we came back from Korea in 2003, but to my delight I found some today in the local Sainsburys! They also had kimchi, but it was a big disappointment.

The best type of bibimbap is the tolsot bibimbap, which is cooked in a hot stone dish, allowing the rice to catch and brown on the red-hot base, so you get a crispy, crunchy base layer of rice underneath; so delicious! The veggies are all set beautifully on top of the rice, then when you are ready to eat, you stir in some kochujang (Korean chili paste) and give it all a good mix with a spoon. You eat it with a spoon, not chopsticks. You really need some crisp, cool kimchi, or fermented cabbage, with it too.


For two generous portions:

200g short grain rice 
1 medium courgette
2 large carrots
200g fresh spinach
100g mushroom
200g beansprouts
1 tbsp sesame seeds, toasted for 5 minutes or so in a hot oven or in a dry frying pan - don't let them burn
sesame oil
soy sauce
2 eggs
For the kochujang sauce (you may need more, depending on how much people like):
1 tbsp kochujang
1 tsp soy sauce
1 tsp maple syrup


  1. Prepare all the veggies - cut the courgette lengthways in quarters, then into thin slices. Put in a colander and sprinkle with coarse salt, then set aside for 15 minutes.
  2. Peel and cut the carrots into matchsticks.
  3. Wash, dry and thinly slice the mushrooms.
  4. Wash the spinach and beansprouts.
  5. Prepare and cook the rice: rinse it several times in cold water, then leave to soak in cold water for about 30 minutes. Drain and put in a heavy based saucepan with a tight-fitting lid  (preferably non-stick to help when cleaning up). Pour in 250ml cold water, then bring to the boil with the lid on. Reduce the heat and cook for 7 minutes, then quickly stir it; it will be starting to stick to the base of the pan - just scrape it off the base as quickly as you can and get the lid back on to keep the heat and steam in. After that, leave it on the lowest heat for another 2 minutes without removing the lid, then take it off  the heat and leave it for another 10 minutes, again without removing the lid. Alternatively use a rice cooker - I wish I had one.
  6. Rinse and drain the courgettes. Bring a large pan of water to the boil, then blanch the courgettes for 1 minute. Remove from the water with a slotted spoon, drain them in a colander, then toss them with a dash of sesame oil and soy sauce.
  7. Bring the pan of water back to the boil, drop in the beansprouts and cook them for about 3 minutes. Drain and toss them in a little sesame and soy sauce.
  8. Cook the carrots for about 1 and half minutes in the microwave with a tablespoon of water. Drain them and toss them in the same sesame soy sauce mix.
  9. Fry the mushrooms a little sunflower oil, adding some crushed garlic if you like.
  10. Tip the mushrooms into a dish, then put the spinach in the frying pan and let it wilt over a low heat until it looks cooked - press it in a sieve to get the excess liquid out, then toss in sesame and soy sauce.
  11. It doesn't matter if the veggies are at room temperature - the rice should be hot though.
  12. Fry the eggs.
  13. Assemble the bibimbap - put the rice into warmed bowls, top with the fried egg, then arrange the veggies around the edge. Sprinkle with toasted sesame seeds. Veggie daughter's is the one at the top - she took a bit more care than me with the arranging.
  14. Stir together the ingredients for the kochujang sauce - allow each person to put as much of it as they like into their bowl, depending on how spicy they like it. Give it all a good stir and devour.


Sunday 12 June 2016

Refried Beans


2 cans borlotti beans, drained (reserve some of the liquid)
1 onion, finely chopped 
1 small green chilli (or to taste) very finely chopped 
2 cloves garlic, minced
1 tsp ground cumin 
1 tsp ground coriander 
1 bay leaf 
Good glug of olive oil 
Salt and pepper 

1. Fry the onion, garlic, chilli and spices gently in plenty of olive oil until softened and just starting to brown.
2. Add the beans to the pan and heat gently with the onion mixture until combined, smooshing the beans with the wooden spoon so they start to break up. Add the bay leaf and heat gently for 2 or 3 minutes, until the mixture is hot. Add some bean liquid if it looks too dry. (Some people like their Refried beans puréed, but I prefer them only slightly broken up, with some whole beans left in the mixture; if you want them smooth, blast them in a food processor or with a hand blender.)
3. Taste and season with plenty of salt and pepper.
4. Serve with soft tortillas, grated cheese, lettuce, sour cream or whatever other Mexican style accompaniments you like.


Friday 15 April 2016

Baked aubergines in tomato sauce


Once, a long time ago, on our last holiday before the kids were born, we went to Crete, where we ate a delicious baked aubergine dish that we christened Sitia Aubergines, after the town where we ate them. We tried many times to replicate the oily, tomatoey, garlicky delectableness, with the soft aubergines that melted in our mouths and the delicious sauce that just cried out to be mopped up by the hunks of fresh Greek bread. But we never quite got there. Recently I tried again, and although we consumed that original dish getting on for 24 years ago, I think it was something like this. As with most Greek cooking, copious amounts of olive oil help to achieve a good level of authenticity. Anyway, it was very tasty and perfect with pasta. Or just with hunks of bread reheated th next day for lunch . 


2 large aubergines 
Olive oil, more than you would think sensible 
1 onion 
2 cloves garlic 
1 tsp dried oregano
1/2 tsp dried basil
Salt
Pepper 
1 tin chopped tomatoes or Passata 
Squirt of tomato purée 
Dash balsamic vinegar 
Tsp sugar
Some red peppers from a jar in oil if you like
Fresh basil if you have some

Slice the aubergines lengthwise to about 1/2 cm thickness.
Spread the slices on a tray and sprinkle with salt.
Set aside for about 30 minutes to allow the moisture to run out.
Meanwhile, finely chop the onion and mince the garlic, then fry them gently in olive oil to soften, adding the dried herbs. Add the tomatoes, purée, balsamic vinegar, swish out the tin with water and add that too, add the peppers if using, then season with plenty of pepper and simmer gently for about 20 minutes. Purée with a hand blender.
Heat a good glug of olive oil in a heavy frying pan, mop the aubergine slices with kitchen towel and fry them gently in batches until lightly browned. 
Spoon a layer of tomato sauce in to a large shallow oven dish, top with a layer of aubergines and shred some fresh basil over it if using. Repeat these layers, ending with sauce. You can top with some torn up mozzarella at this stage, but it is great without.
Bake in a 190c oven for about half an hour, until the sauce is bubbling and the aubergines are nice and soft.


Pastitsio with soya mince


Last summer we visited relatives in Greece. When we arrived, Milly had cooked us a delicious pastitsio - a traditional Greek pasta bake, with layers of tomato sauce, cheese sauce and pasta, quite a lot like a lasagne but using a pasta similar to macaroni. Unfortunately, Milly didn't know that veggie daughter didn't eat meat, so the pastitsio contained beef, but veggie daughter was hungry after our long journey and managed to eat around the meat layer, finding out in the process that pastitsio is a wonderful thing. 

Fast forward to a cool spring day in the UK and veggie daughter and I find ourselves craving that delectable feast (along with the Greek sunshine that went with it). I looked up recipes, wondering how I can feel so hungry for the flavours of pastitsio at 10 in the morning. Many of the traditional recipes have cinnamon and allspice in them. I'm not a huge fan of cinnamon in savoury dishes and one recipe I found said that cinnamon absolutely does not belong in traditional pastitsio. I took that as permission to leave it out! I don't remember Milly's tasting particularly of cinnamon; the meat layer was more like the beef sauce layer of an Italian lasagne; lots of tomato, garlic, and probably oregano. A lot of the recipes said to put oil and parmesan or an authentic Greek cheese called Kefalotyri (which I've never tried but would like to) into the pasta layer. I ended up using halloumi, as I had a pack open in the fridge that needed using up. Some recipes added beaten egg to the white sauce. Some separated the egg, adding the whites to the pasta layer, and the yolk to the white sauce. 

The type of pasta to use is the source of much debate, with some saying it must be ziti or some other traditional Greek type and others saying that penne or pretty much any type of macaroni will do. A lot of the recipes show the pasta very carefully and evenly laid across the dish to make a beautiful pattern when the pastitsio is served. It looked like too much effort for a lazy cook like me. I used macaroni, layered as it fell rather than artfully arranged.  Most of the recipes suggested using beef, some lamb, but obviously I needed a veggie alternative. I found some versions using lentils and some with varying combinations of mixed vegetables, and then I came across this recipe for soy pastitsio on a great website called vegetarian underground. So thanking Sally K for that recipe, I unearthed the savoury soya protein mince from the back of the cupboard and assembled the rest of my ingredients. I did make quite a few changes to the original recipe, mainly based on what I'd read on other sites and on what I remembered of Milly's pastitsio. 

One layer of Sally's pastitsio that intrigued me was the silken tofu - I think it could probably be omitted, but I must admit that it did keep the dish nice and moist and the herbs in it added to the flavour. I happened to have a couple of cartons of silken tofu in the cupboard and welcomed the opportunity to use it - I'm never really sure what to do with it. Anyway, my recipe is below. It was a hit with veggie daughter and the meat eaters alike. It did take longer than I had planned to assemble, so by the time I got it into the oven we were ravenous. We ended up taking it out of the oven a bit earlier than I would have liked, but it still tasted great. Most people say you should leave it to rest after it comes out of the oven, and eat it lukewarm, as you get a nicely shaped firm portion, but we just couldn't wait...

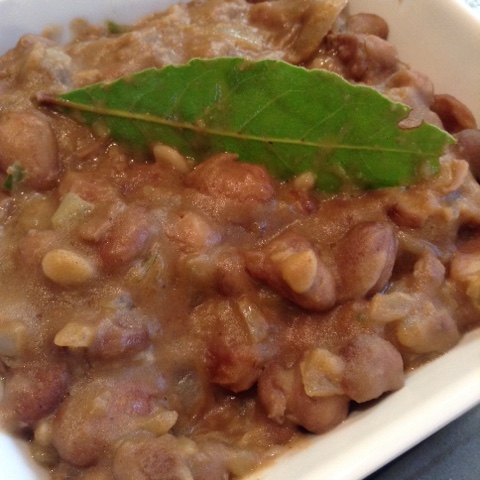
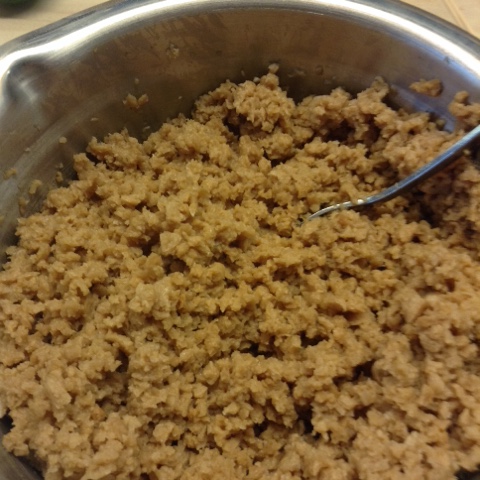
The soya mince a-soaking - it does not smell very appetising at this stage, but don't be put off...
Silken tofu and herbs


Soya Mince Pastitsio (serves 6)

For the mince layer:
200g dried soya mince (TVP)
600ml cold water
4 tbsp olive oil
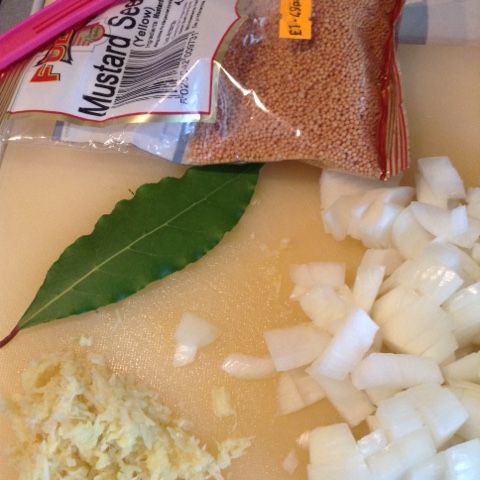
2 yellow onions, finely chopped
4 cloves garlic, minced
2 tsp dried oregano
1 tsp dried basil
1 tsp smoked paprika
1/2 tsp allspice powder
2 tsp paprika powder
salt and pepper
1 tin tomatoes (chopped)
1 carton passata
a good squeeze of tomato puree
dash of balsamic vinegar or red wine (I only had balsamic)
1 bay leaf

For the pasta layer:
500g macaroni or similar pasta
salt
olive oil
1 tbsp grated halloumi
For the tofu layer:
1 carton (350g) silken tofu
handful of fresh basil and parsley
1 small clove garlic
50g grated halloumi
salt and freshly ground black pepper

For the white sauce:
2 tbsp butter
2 tbsp plain flour
about 500ml milk (I added some cream that needed using up)
250g grated halloumi
50g grated halloumi to sprinkle over the top
freshly grated nutmeg

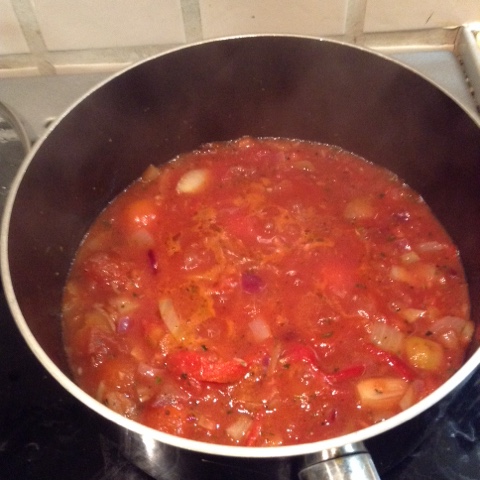
1. Prepare the mince layer: 
  1. Put the soya mince a large bowl, pour over the water and stir in the olive oil. Leave to absorb for about 30 minutes or so.
  2. Gently saute the onion, garlic, dried herbs and spices in a good glug of olive oil.
  3. Add the soya mince and stir to combine with the onion and garlic mixture.
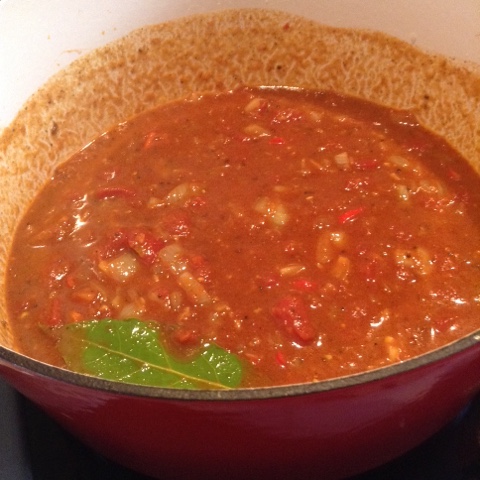
  4. Add the tin of tomatoes, passata, tomato puree, balsamic vinegar, bay leaf and seasoning and bring to the boil. Simmer for a few minutes until most of the liquid has evaporated or been absorbed into the mince.
  5. Take off the heat and set aside to cool slightly.

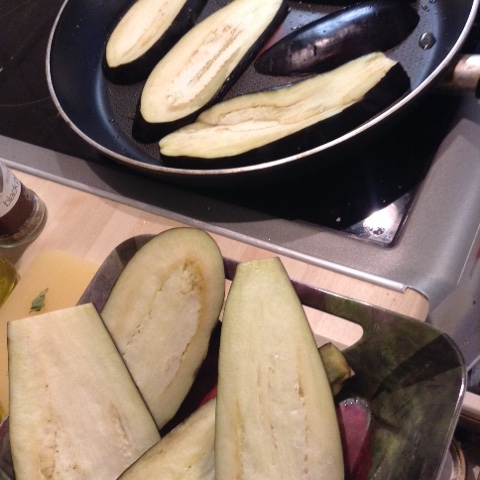
2. Prepare the pasta layer:
  1. Cook the pasta in boiling salted water for 2 minutes less than the correct cooking time (it should still be firm.
  2. Drain and stir in a tablespoon of olive oil to stop it sticking together, along with a tablespoon of halloumi cheese and set aside to cool.
Herby silken tofu layer
3. Prepare the tofu layer:
  1. Wash the herbs and discard tough stems.
  2. Peel the garlic clove.
  3. Put the tofu, herbs, garlic, halloumi into a blender and season with black pepper.
  4. Blend until smooth.


4. Prepare the white sauce:
  1. Melt the butter in a large heavy based pan.
  2. Stir in the flour, combining it with the butter to make a smooth paste.
  3. Gradually add the milk, stirring all the time to combine. Keep stirring as the sauce thickens to avoid lumps forming.
  4. Remove from the heat and stir in the grated cheese.
  5. Smooth creamy cheese sauce
  6. Once it has cooled slightly add the beaten egg and beat it in (you don't want it to be too hot or the egg will scramble).


5. Assemble and bake the pastitsio:
  1. Preheat the oven to 200 degrees centigrade.
  2. In a large oven proof dish (about 2 inches tall, about 12 x 9 inches base) put a layer of soya mince sauce (aim to use about a third of the sauce in this layer).
  3. Top with half the macaroni, pressing it down quite firmly (you don't want gaps)
  4. Spread over half the tofu sauce.
  5. Use another third of the mince sauce for the next layer.
  6. Add the rest of the macaroni and press down firmly
  7. Use the rest of the tofu sauce over the top of the macaroni.
  8. For the next layer add the rest of the meat sauce.
  9. Top the whole thing with the cheese sauce, smoothing it out evenly.
  10. Sprinkle with grated cheese and grated nutmeg.
  11. Bake uncovered for about 35 minutes,  until golden brown and bubbling. (Stand the dish on a baking sheet if you have overfilled it like I did, otherwise you will be in for an oven cleaning session.)
  12. If you can bear it, leave to rest for at least 15 minutes before serving (purists say pastitsio should be cooked the day before eating; certainly the leftovers were amazing the next day).
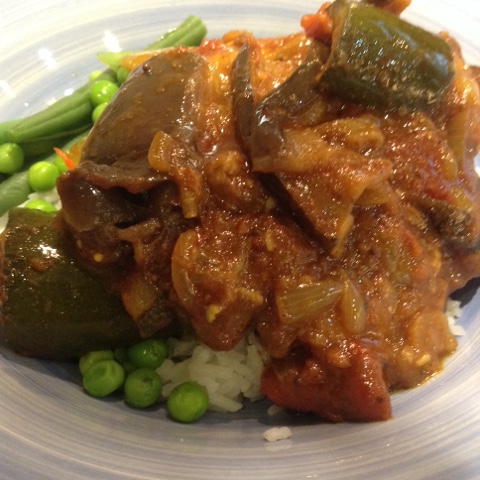
  13. Serve with some green veggies or salad.


Tuesday 16 February 2016

Butternut filo pie with North African Spices


This was served to us by some veggie friends recently and we loved it! Fortunately for us, they didn't mind divulging where they got the recipe (BBC Good Food Moroccan Spiced Pie). I did make a couple of adjustments, mainly because I'm a bit of a lazy cook and will always seek out ways to cut corners. The technique with the filo pastry works really well, and looks very impressive - I think I will try out different fillings using this pastry technique. The addition of some feta cheese, or maybe some halloumi might be nice, but it is very good without. It is also delicious served cold the next day and would make a great picnic pie (although it does tend to fall apart when cut). It is very filling, with all the nuts, and perhaps a tad on the dry side, but the harissa yoghurt sauce is a perfect accompaniment. Ironically veggie daughter is not as keen on the pie as her parents...


2 medium butternut squashes, about 900g, peeled and cut into 1 inch chunks
2 tsp ras el hanout (or mixture of cumin seeds, coriander, cayenne pepper and smoked paprika)
good glug of olive oil
salt and pepper
225g frozen spinach
about 12 shallots, peeled and halved
thumb sized piece of root ginger, grated or finely chopped
100g whole blanched almonds
100g shelled pistachios
50g flaked almonds
50g dried cranberries 
2tbsp honey
400g tin chickpeas, drained and rinsed
1 fat clove smoked garlic (or normal garlic if you can't get smoked)
1 tsp ground cumin
2 tbsp lemon juice (to taste)
small bunch fresh coriander, washed and dried
good glug of olive oil
1 pack of filo pastry
100g butter

For the harissa yoghurt sauce:

3 - 4 tbsp plain yoghurt
2 tsp harissa paste
1 tsp lemon juice
1 tbsp chopped fresh coriander
1/2 tsp sugar
salt to taste


  1. Toss the butternut, grated ginger and halved shallots in olive oil and spice mix, season well. If you like a bit more spice, add a teaspoon of korean chili paste (gochujang)
  2. Roast in a 200C oven for about 20 minutes
  3. Meanwhile cook the spinach in a microwave for a couple of minutes, then drain well. (The original recipe called for fresh spinach, but I forgot to buy it, and had some frozen that I substituted).
  4. In a frying pan, toast 80g each of the  almonds and pistachios.
  5. When brown stir into the butternut mix along with cranberries, (I used half and half cranberries and goji berries, because I wanted to try goji berries and they were an interesting colour - I liked them, but veggie daughter thought they tasted of feet) 1 tablespoon of honey and the spinach. Set aside. 

Butternut, spinach, nut and shallot mixture, yum!
  1. In a food processor, whizz the chickpeas with the coriander (no need to chop first) garlic, cumin, remaining oil, lemon juice, 2 tbsp water and salt and pepper to make houmous. 
  2. Melt the butter in a small pan. Put a loose-bottomed 28cm quiche tin on a baking sheet and brush with some butter. Keeping the filo covered with a damp cloth so it doesn’t dry out, lay one sheet over half of the tin so that it hangs over the edge by about 10cm. Lay another sheet on the other side, so it overlaps the first in the centre and hangs over the opposite edge. Brush with butter. Lay two more filo sheets in the opposite direction in the same way and brush with more butter.
  3. Keep building up the layers until you have used all of the filo. Pile half the butternut mixture in the centre of the pastry. Spread over the houmous and then the rest of the squash mixture.One at a time, bring the edge of each filo sheet up to the centre to cover the filling, creating voluptuous folds as you go. Brush carefully with more butter. (If making a day ahead, cover now with cling film and chill. To reheat, remove the pie from the fridge, heat the oven, then bake for 35-40 minutes.)
    The pie in progress - hummous layer on top of butternut layer
    The pie ready to bake


  4. Bake in a preheated oven (fan 180C) for 30-35 minutes, until crisp and golden. Just before the pie is ready, reheat any remaining butter in the pan, tip in the rest of the nuts and fry until golden. Spoon in the remaining tbsps of honey and, when it melts, take off the heat and pour over the pie. Serve with Harissa yogurt sauce (mix the yogurt, lemon juice, sugar and coriander. Swirl in harissa to taste).